Making a Paint Booth with PVC Pipe and Drop Cloth
When winter comes, it’s hard to get a good day to apply paint to rockets and other crafts. So I move my painting inside with a cheap paint booth.

First thing I must stress: Be Safe. You have to ventilate your painting area actively, and ensure you’re not painting near ignition sources like furnace pilot lights. I use a window fan to exhaust my workshop as I paint. I also wear an N100 mask (which isn’t really designed for painting and won’t get everything, but has filter elements that pick up some organic compounds, and which will filter out most paint droplets). Make sure you have adequate fresh air, and someone to check on you.
If you like this paint booth and want to make yourself one, understand that its safety is NOT guaranteed, and you’re taking any and all risks on for yourself. I take no responsibility for the outcome.
Making the booth
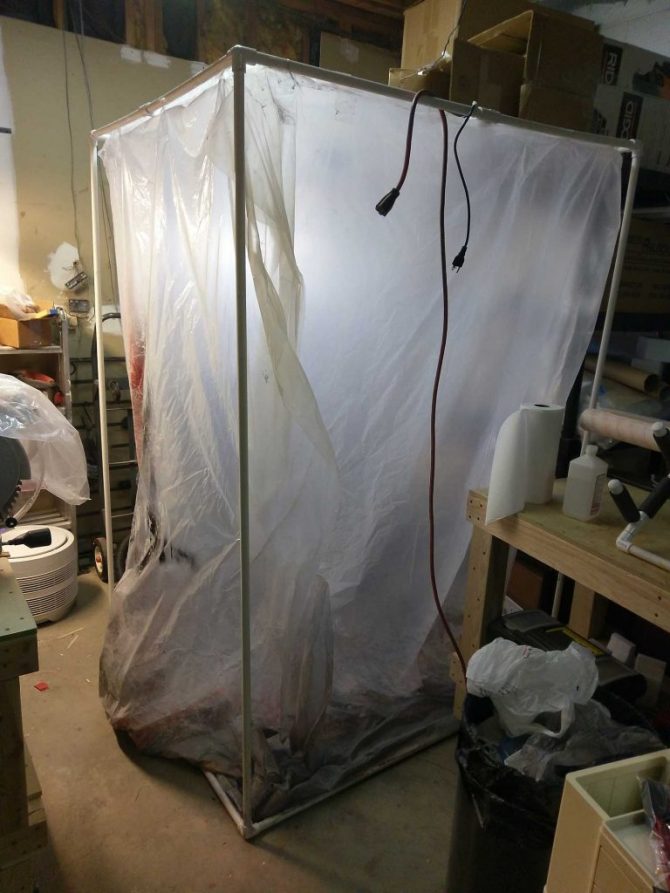
You’ll need a couple big plastic drop cloths, a few pieces of PVC and some fittings for the job:
- 4 – 6-foot 1/2″ PVC Pipe
- 8 – 4-foot 1/2″ PVC Pipe
- 8 – 90-degree 1/2″ PVC side outlet slip elbows
- 2 – minimum 10’x10′ thick translucent plastic drop cloths (the thicker, the more durable)
- Heavy-duty plastic packing tape
How does the frame work?

You make a basic box out of the PVC pipe and slip elbows. The box is 6 feet tall, and 4×4 feet wide x deep. You’ll create what is basically a big bag with the two drop cloths, and suspend it inside the PVC pipe frame. Placing the bag inside is important. You want the bag inside the frame so you can disassemble the frame and store it flat (but all attached) when you don’t need it.
Don’t use PVC cement – otherwise you won’t be able to disassemble the booth, which is handy for storage, and to make it easy to enhance the booth if desired.
Making the big bag with the drop cloths
Make a big “L” out of each of the drop cloths. The long sides are 10 feet long, and the short sides are 4 feet wide. This leaves a 6-foot “tongue” hanging out each side of the box.
Fold the sides (the tongues) up, and tape the seam between the sides with the packaging tape. Make the seal airtight.

The pictured drop cloth assembly is one of two. The floor of the pictured assembly matches the ceiling of the other drop cloth. Tape the two “halves” of the big bag together and seal the tops and bottoms and ONE of the long vertical seams together. Make sure and leave one of the long seams un-taped, so you will have stand-up access to the interior. You can close the open corner with clothespins once you’re done.
Use packaging tape to attach/hang the top and bottom sides of the bag to the top and bottom square frames. Do not tape to the vertical pieces. This way, you’ll be able to pull out the vertical pieces for storage.

Using the paint booth
When I set the booth up, it takes a few seconds to a couple minutes for air to fill the stored-flat bag and for the bag to hang easily. During this influx of air, it’s going to take in any airborne dust in the area. For this reason, I set the booth up, and try to leave a good long time for the interior dust to settle before I paint.
If you’re painting in a normally dusty area (my workshop, for example) you can use the booth as a relatively low-dust environment for your painted item to dry. Just clip up the open seam with clothespins to minimize air transfer after you’ve painted.
Over time, overspray is going to hit the walls of the booth, and will dry but not adhere firmly. This will eventually settle at the bottom of the booth as grit and dust. You’ll eventually have to vacuum it out or find some other way of removing the dust from the booth so you don’t mess up your paint job.
Enhancing the paint booth
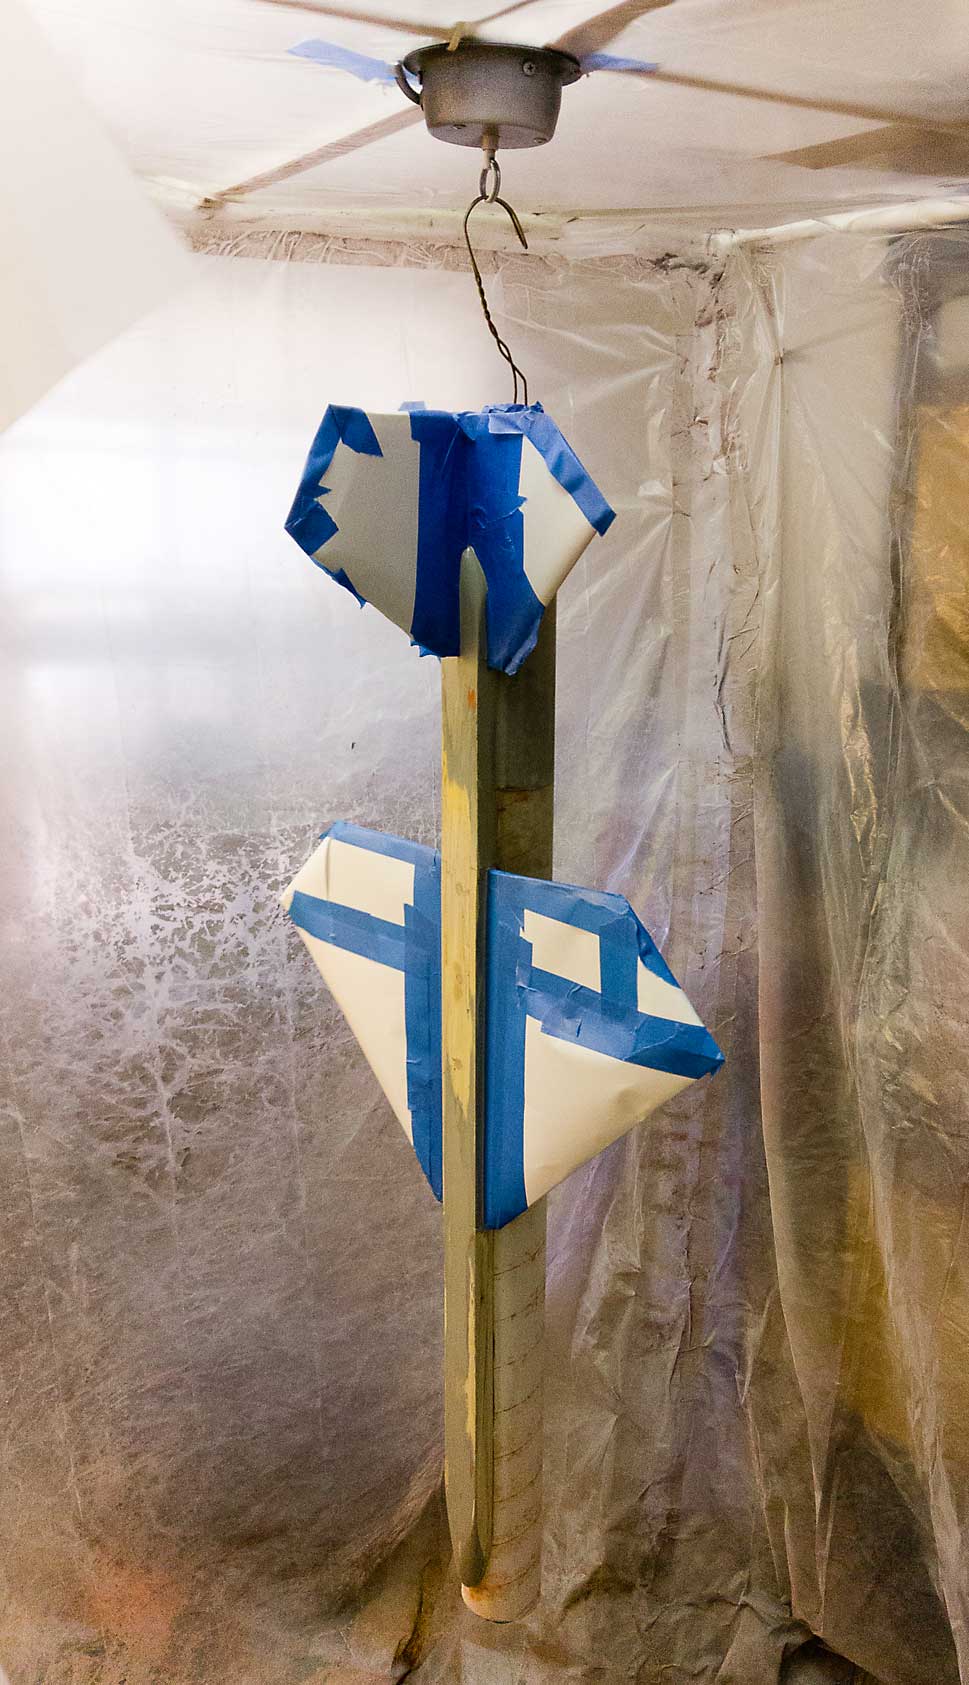
I recently added a “mirror ball motor” to allow me to spin the work in front of me.
I’m undecided on its effectiveness so far, but the basic concept works, and holds most of my work without a problem. I placed the motor inside the big bag, and split the top square frame into 2×2-foot sections, and attached a PVC slip cross in the middle, with four 2-foot PVC pipes for support. I then zip-tied the motor to the overhead supports, and poked the plug and cord through the bag, sealing the bag back up after.
The mirror ball motor comes with an attached chain, and I tried hanging work from it, but this doesn’t work well: too much slack in the chain, and paint pushes the work around. Better to hang the work from the spinning ring above the chain (as pictured).
Again, SAFETY!
One more reminder: Make sure you aren’t painting near ignition sources (like pilot lights, stoves and on-demand gas water heaters, propane torches, etc.) and make sure you have adequate ventilation and plenty of oxygen, as well as someone to check on you once in a while, in case you’ve miscalculated. Think also about the long-term effects of working with paint and propellants: this booth setup is designed for occasional use. No telling what it could do to you long-term.
Finally, if you choose to build such a booth and use it for paint and related work, understand that you’re doing it completely at your own risk. I’ve described what I do, but you’re taking any risks on yourself. I take no responsibility if things don’t go great for you (though I hope you get great results if you try it!)